Tuesday, October 18, 2011

Wedding :)

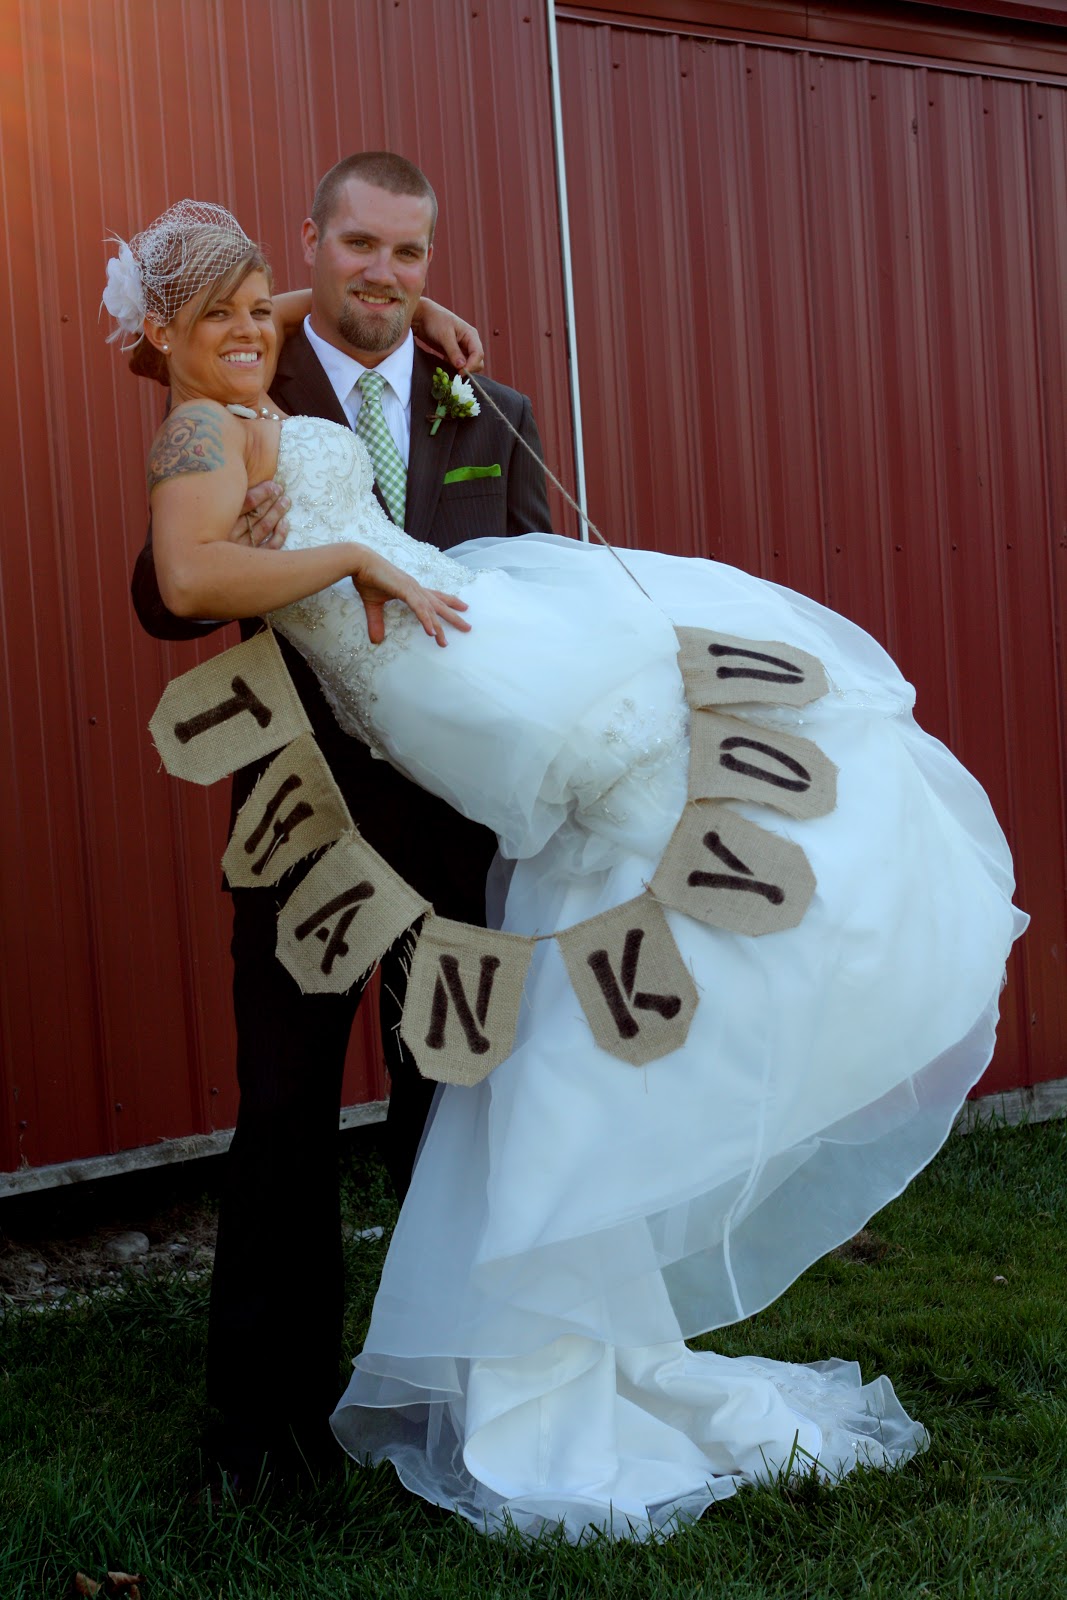
Well friends I know it's been awhile since I've made a post. Weddings are very time consuming! I'm free again. Well now it's time to plan my sisters wedding but I promise to try to cook some more because I'm missing it, lets be honest, and I went on a shopping spree today with my new husband and bought many new cooking tools. We are excited to start using them! Our wedding was amazing, I wouldn't change a thing. I'd like to say thanks to my Mother for all the help and creativity she put into the wedding. She made it perfect for us and I'll remember it forever and what she did to make it perfect. We got married in a big red barn out in the country. It was the perfect setting for us. I hope everyone enjoys some of the photos! More photos to come soon


 Kisses for the bride!
 The beautiful flower baby Zoe..she didn't throw flowers just looked adorable for the ride down the aisle.


 Rustic door we borrowed from my Mom to display pictures


 Burlap banners my mom made


Sunday, September 11, 2011

Foil Baked Fish with Hasselback Potatoes

Just made this dish tonight for dinner! My fiance made the potatoes and I made the fish, we made a compromise :) Of course whenever I really enjoy something, my fiance dislikes it, or vice versa. It's too bad we can't enjoy the same meals at times..guess I'll have to have a dinner party soon with my wonderful bridesmaid Erin. She's the one who introduced me to trying fish! Now I try to eat it once a week. The dish is pretty simple to make and it also looks pretty! This is a good week night meal! I can't wait to try it again, with out my fiance that is! I guess that's what friends are for.

Foil-Baked Fish with Corn
2-4 white fish fillets (I used tilapia)
salt and pepper to taste
4tblsp butter softened
2tsp minced chipotle peppers in adobo sauce
1tsp grated orange zest
2tbsp orange juice
2 cloves garlic, minced
2 cups corn kernels
1/4 red onion, minced
1/4c fresh cilantro

You may add black beans to this recipe, I dislike them so I omitted them. I know, who doesn't like beans right? 

Preheat oven to 425. Pat fish dry and season with salt and pepper. Using a fork or whisk mix together the butter, 1tsp of the chipotle peppers, orange zest, salt and pepper, and one clove of garlic. (I used three because I love garlic, and who doesn't like extra flavor)?! Spread over fish.

Combine the corn, (I shucked some fresh corn). If using beans add these as well, onion, orange juice, 2tblsp of cilantro, the other half of the chipotle peppers and garlic, season with salt and pepper.

Lay out 2-4 14" pieces of foil and cover the bottom half with the corn mixture. Lay buttered fish on top and fold foil over to make packets. Place on a baking pan or dish and bake in the oven for 15-20 minutes. Carefully open the packets and sprinkle the remaining cilantro on top.
*Slightly adapted from Pink Parsley: Foil-Baked Fish with Black Beans and Corn


Hasselback Potatoes
2 Russet potatoes
Olive oil
Salt and pepper to taste
Dried basil
Garlic sliced into thin layers

Preheat oven to 425 degrees. After washing the potatoes, thinly slice each potato, being careful not to cut all the way through. (Place the potato on a large serving spoon so you won't cut all the way through).

Season each potato with basil, salt and freshly cracked pepper. Place a thin slice of garlic between each layer. Place the potatoes in a baking dish and drizzle with olive oil. Bake potatoes for one hour or until baked through. Serve with butter and sour cream.  We baked the potatoes for about an hour and fifteen minutes and they were still a little tough. They were still really good though. Nice and crisp on the outside. I can't wait to make this dish again! Enjoy!


Grandma Vernie's Hot Fudge Sauce

I can remember being a little girl and having many memories with my grandma. She is by far the best grandma around and I'm so happy to say I'm still enjoying her company 25 years later. Grandma doesn't cook anymore but that's why she's given her recipes to her granddaughters so we can share them with family and friends. This is the same grandma that used to make chicken spaghetti. :) I introduced that dish to the lovely ladies of Sweet Mandy B's (yummy bakery in Chicago I used to work at)  and they loved it so much. It's awesome to know my grandma's food can be passed down to many people who also enjoy it. Love you grandma! My favorite food memories of my grandma would have to be hay stacks, (which I will have to make when I get back from my honeymoon), mud buddies (also known as puppy chow) my grandma calls it this so I always have and no one ever knows what the heck I'm talking about, and her chicken spaghetti and of course hot fudge sauce!  Anyways, back to the hot fudge sauce...which is to die for! Thanks to my sister for making it for the bridal shower. This sauce is super easy to make and refrigerates and reheats well. I think it's best over vanilla ice cream, maybe that's because that's how I always remember having it. It's perfect for making sundaes too and even adding to milkshakes. Mmm, I think I'm going to have to have a bowl tonight! Every time I take a bite into this sauce it brings back all kinds of memories. You need to make this now, you may not have special memories of my awesome grandma but it's very yummy!

Grandma Braun's Hot Fudge Sauce
1/4C plus 2tbsp sugar
5oz evaporated milk
3/4C chocolate chips
1 1/2tsp butter
1/2tsp vanilla

Yields: 1cup
Combine sugar, milk and chocolate chips in small saucepan. Cook over medium heat, stirring until chocolate melts and mixture boils. Remove from heat and stir in butter and vanilla. Serve hot over ice cream. I noticed it's not as grainy if you let it cool a little, and after refrigeration and reheating it's even better. Thanks again Grandma I hope everyone enjoys this :)


Friday, August 5, 2011

Sour Cream Chocolate Chocolate Chip Banana Bread

It's that time again where I need to use up my old bananas. I like banana bread and so does the family I nanny for. Of course, I have to add chocolate to anything I can. So why not chocolate banana bread? Yes, please! It's like healthy cake! (I wish!) Anyways, I'm glad I decided to make this. I wasn't sure it would be chocolatey enough for me, because the batter didn't seem too dark. Let me reassure you it had the just the right amount of chocolate! Especially with the chocolate chips throughout the bread. I used regular chocolate chips because that's all I had, next time I will try the mini. There is something about mini chocolate chips that I enjoy when it comes to baked goods. I was hoping this bread would live up to my standards, and I could tell by the first bite it definitely did, and then some! It was very moist, and I loved that it was chocolate, and then more chocolate, while still being banana bread! Perfect ratio of each ingredient. So far everyone I know that has tried this enjoyed it, so if you're looking for a good chocolate banana bread recipe I highly recommend this one. Even better? A nice slice of salted butter. Anything that adds a slightly salty taste to something sweet is an A+ in my book! This recipe is super easy to make and takes little time in the mixer. Best eaten when warm! :)

Sour Cream Chocolate, Chocolate Chip Banana Bread
1 stick of salted butter, softened to room temp.
1/2 cup sugar
1 egg
3 large ripened bananas mashed
1 tsp. vanilla
1 cup flour
1 tsp. baking soda
2 tblsp. cocoa powder
1/2 cup of sour cream
1 cup of mini chocolate chips (regular chocolate chips work also)

Preheat oven to 350 degrees. Grease your loaf pans, or pans you'll be baking in. Cream butter and sugar in a large bowl, or kitchen aid stand mixer. Mix in egg, mashed bananas, sour cream, and vanilla until  blended. Add baking soda, cocoa, and flour. Mix everything until well incorporated. Add chocolate chips and mix until just incorporated. Pour into baking pans and bake 50-60 minutes, or until a tooth pick or knife inserted comes out clean.
*Slightly adapted from http://savorysweetlife.com/2009/06/rich-and-moist-sour-cream-chocolate-chocolate-chip-banana-bread-recipe/

Monday, August 1, 2011

Brown Butter Chocolate Chip Cookies

One of my favorite things ever is chocolate chip cookies. I can't get enough of them, and I have many chocolate chip recipes sitting in my recipe box. Usually by the time the cookies bake I don't eat much due to the fact that I've already eaten one too many spoonfuls of cookie dough. Mmm, it's my weakness. I stumbled upon a chocolate chip recipe that uses browned butter and I was curious to see what the difference was. I'll have to try the browned butter with one of my favorite cookie recipes to taste the real difference. You can use any chocolate chip recipe and brown your butter. It's very simple, you just have to baby sit your butter a little so that it doesn't burn! Let me tell you the way the butter smells is like dying and going to heaven. Well, my heaven that is! I went to make these and realized I didn't have enough sugar. I almost said forget it, but I really wanted cookies, and I had already browned my butter. Which smelled amazing! I decided to walk over to the Indian mart by my house and purchase some sugar. I figured it's not that far of a walk and maybe it'll help to take a small walk knowing I'll be eating loads of dough in a few minutes. I'm actually kind of glad I did go to the store because when I got home and I opened up my door, it was like the brown butter was inviting me in to smell all it's loveliness. I thought to myself, why can't they bottle this scent up and stick it in a candle? Probably because I'd be making cookies every day. Anyways, I urge you to make these. You can always just take your favorite cookie recipe and just brown the butter instead! Delish. 

Brown Butter Chocolate Chip Cookies
Makes 2 1/2 dozen cookies

1 cup unsalted butter
1/2 cup sugar
1 cup brown sugar
2 eggs
1 teaspoon vanilla
2 1/2 cup all purpose flour
1 teaspoon baking soda
1/2 teaspoon salt
2 cups (1 pound) semi-sweet chocolate chips


In a medium saucepan over low heat, melt the butter. Once butter has melted, cook butter until it has browned. Be careful not to burn your butter, this can happen fairly quick. When the butter has turned golden in color small flecks appear in the butter, and it has a nutty aroma, remove from heat and pour into a shallow dish. Chill in the fridge until it becomes solid. You want it to be soft, but not melted. If it becomes too hard, let it come back to room temperature before using.

Preheat oven to 375 degrees and line a sheet pan with parchment paper.

Beat the brown butter, sugar, and brown sugar on medium high speed with an electric mixer until light and creamy, about 4 minutes. Add the eggs one at a time, mixing after each. Scrape the bowl and mix until incorporated. Add the vanilla.

Add the flour, baking soda, and salt and mix until just combined on medium speed. Add the chocolate chips and mix until incorporated.

Spoon dough by tablespoons onto the baking sheet, leaving 2 inches in between each cookie. Bake until golden brown, 10-12 minutes. Cool on a wire rack.

Sunday, July 31, 2011

Pizza Pizza!

I looove pizza! Who doesn't? My fiance and I eat pizza about once a week. I've got muffin tops to prove it. :) We usually order out for pizza, we've made it a few times, but always got Trader Joe's crust (which is a pretty good crust). I've just decided I'd like to make my own and have it taste even more magnificent. I also know exactly what ingredients are going into my pizza. I found this recipe on http://annies-eats.net/2011/02/07/thin-crust-pizza/. It looked very yummy, I decided I had to try it. You'll need to make the dough in advance and chill for at least 24 hours. Very well worth it, and super easy to make from the crust to the sauce. What's even better? Left over dough and sauce for next time! The crust is perfect and crisp, the sauce is amazing, and the cheese is perfect. My mouth is watering even thinking about it. I loved it so much I'm making it Friday night, which is usually pizza night or eat out night in our house. I am a cheese pizza lover (I know boring, right?) my fiance loves sausage, so he made himself a sausage pizza. The crust makes 2-13" pizzas, so we had one for the each of us. I didn't finish mine, but I did get pretty close, like I said I love pizza! We had left over sauce so we froze it for next time. The only change were making is cooking his sausage before he puts it on the pizza, due to lots of grease. Other than  that this pizza was pretty perfect.
Thin Crust Pizza

Yield: 2-13" Pizzas
Crust:
3 cups (16½ oz.) bread flour
2 tsp. sugar
½ tsp. instant yeast
1 1/3 cups ice water
1 tbsp. vegetable oil
1½ tsp. salt

Sauce:
1 (28 oz.) can whole peeled tomatoes, drained
1 tbsp. extra-virgin olive oil
1 tsp. red wine vinegar
2 cloves garlic, minced
1 tsp. salt
1 tsp. oregano
 1/4 tsp. ground black pepper
Topping:
Olive oil and garlic powder for brushing dough
1/2 cup (1 oz.) finely grated Parmesan cheese
2 cups (8 oz.) shredded whole-milk mozzarella

Combine the flour, sugar, and yeast in the bowl of a food processor* (I used a kitchen aid stand mixer with a dough hook and it worked just fine) fitted with the metal blade.  Pulse just to combine.  With the machine running, add the ice water through the feed tube and process just until the dough is combined and all dry ingredients are incorporated, about 10 seconds.  Let the dough set for 10 minutes.Add oil and salt to the dough until incorporated into a smooth tacky ball that pulls away from the bowl about 30-60 seconds.  Remove the dough from the bowl, knead briefly on a lightly oiled work surface, about 1 minute.  Transfer to a lightly oiled bowl, cover with plastic wrap and refrigerate for at least 24 hours. You may refrigerate for up to 3 days.  If you plan on only making one pizza you may freeze half of dough. To make the sauce, combine all ingredients in a food processor.  Blend until smooth, about 30 seconds.  Transfer to a bowl until ready for use. One hour before baking the pizza, adjust an oven rack to the second highest position and place a baking stone on the rack to preheat.  Preheat the oven to 500˚ F.  Remove the pizza dough from the refrigerator and divide in half. Form each half into a ball and place on a lightly oiled baking sheet. Spray the dough balls lightly with cooking spray. Cover dough loosely with plastic wrap and let sit at room temperature for 1 hour. To make the pizza, transfer a dough ball to a well floured work surface.  Flatten into an 8-inch round, leaving a slightly thicker edge around the outside for your crust. Gently stretch the dough with your hands to a 12-inch circle. Place the dough on your preheated pan, being very careful! Stretch to a 13" circle.  Lightly brush the thicker edge of the disk with the olive oil.  Spread the pizza sauce over the dough, and sprinkle with the grated Parmesan and shredded mozzarella.  Bake until the cheese is bubbling and slightly browned, 10-12 minutes.  Let cool, slice and serve! Enjoy!  
Source: Cook’s Illustrated, January & February, 2011

Thursday, July 28, 2011

Vanilla Bean Cake

I'm always looking for the next best vanilla or white cake recipe. I was looking for a cake that was fluffy, white and delicious! One that also pleased my fiance, as anything vanilla is his cup of tea. I'm the exact opposite, I will eat anything over loaded with chocolate. Hey, we have to keep the men happy sometimes too right? I think I may have finally found my vanilla cake go to recipe, I of course will test out other recipes to make my final decision but this one is pretty darn good! It's not your typical way of making your cake by creaming method (which is creaming the butter and sugar, adding your eggs etc.) It's different but it works. You MUST use real vanilla beans to get that awesome, sweet, vanilla flavor. They are expensive, but you won't be let down. The frosting is light, fluffy and velvety smooth. The trick to the frosting is to whip, whip, and whip some more until it looks pale and fluffy. This cake bakes pretty quickly and isn't a very tall cake. I love tall cakes, so I think next time I will double the recipe. I would also recommend eating it with in 2 days of baking as it starts to dry out.

Vanilla Cake
Yield: One 2-layer, 8' round cake

6 large egg whites (6 ounces) at room temperature
1 cup whole milk ( 8.5 ounces) at room temperature
2 1/4 teaspoons pure vanilla extract-I recommend using high quality extract
2 1/4 cups sifted cake flour (8 ounces)
1 3/4 cups sugar (12 ounces)
1 tablespoon + 1 teaspoon baking powder
3/4 teaspoon salt
12 tablespoons unsalted butter (6 ounces) at room temperature and cut into cubes


1. Preheat oven to 350°F Grease, and line pans with parchment paper
2. Combine and stir the egg whites, 1/4 cup of milk, and the vanilla in a small bowl or measuring cup. Set aside.
3. Combine the dry ingredients together on low speed in a stand mixer fitted with the paddle mixer. (I use the “stir” setting on my mixer) for 30 seconds.
4. Add the butter and remaining 3/4 cup of milk, and mix on low speed until just moistened. Increase to medium speed and mix for 1 1/2 minutes.
5. Scrape the sides of the bowl and begin to add the egg mixture in 3 separate batches; beat on medium speed for 20 seconds after each addition.
6. Divide the batter in two, spreading it evenly with a small offset palette knife. If you have a kitchen scale, weigh to ensure 2 even layers.
7. Bake 25-35 minutes or until a cake tester comes clean when inserted into the center. Be very careful to not over bake. Check cake at 20 minutes, but not before, and once you feel it’s almost ready, set the timer for 2 minute intervals. Let cool on racks for 10 minutes before loosening the sides with a small metal spatula, and invert onto greased racks, or wax paper. Gently turn cakes back up, so the tops are up and cool completely.
8. Wrap tightly and store at room temperature for up to 2 days, refrigerator for up to 5 days, or frozen for up to 2 months. Best eaten the same day as baked.


Fluffy Vanilla Bean Frosting

3 sticks + 2 tablespoons (13 ounces) unsalted butter, softened and cut into cubes
3 cups sifted (/7 ounces) confectioners’ sugar (icing, powdered)
3 tablespoons milk
1 vanilla bean, scraped
1 teaspoon pure vanilla extract-Recommend high quality vanilla


1.Whip butter for 8 minutes on medium speed in the bowl of a stand mixer fitted with the paddle attachment. Butter will look very pale & creamy.
2. Add remaining ingredients and mix on low speed for 1 minute, then on medium speed for 6 minutes. Frosting will be very light, creamy, and fluffy.

*Recipe source:  http://sweetapolita.com/2011/07/fluffy-vanilla-cake-with-whipped-vanilla-bean-frosting/
Related Posts Plugin for WordPress, Blogger...