Monday, January 2, 2012

Louisiana Chicken Pasta

I spotted this recipe on two blogs I follow and it looked so tasty, I had to try it. I guess it's a spin off Cheesecake Factory's pasta. I have only been to this place once and don't plan on returning anytime soon, only because now I can make it at home! The original recipe calls for fried chicken, I did not fry mine. It was still good, this dish is not diet friendly in any way. Lots of heavy cream! If you like chicken and creamy pasta with a little kick then try this. It's definitely a keeper in my book!


Louisiana Chicken Pasta
For the chicken:
1 large boneless, skinless chicken breast, cut into bite-sized pieces
Salt and pepper
Cajun seasoning
For the pasta:
8 oz. pasta
Kosher salt
For the sauce:
1 tbsp. butter
1 tbsp. olive oil
1 red bell pepper, seeded and coarsely chopped
1 green bell pepper, seeded and coarsely chopped
1/4 cup yellow onion, chopped
3/4 tsp. kosher salt
Freshly ground black pepper, to taste
1/4 tsp. garlic powder
1/2 tsp. Cajun seasoning
1/4 tsp. ground cayenne pepper
1 cup half-and-half
1/2 cup heavy cream
1 tbsp. cornstarch
1 tbsp. water


Season chicken with salt, pepper and cajun seasoning. Add to heated skillet and cook through. Transfer to a a plate and set aside. Cook pasta in a heavily salted pot of water. Drain and set aside. Return skillet, used for chicken to medium heat and add butter and oil. Add peppers and onion and saute with salt, pepper, cajun, and cayenne. Cook the veggies until tender. Add half and half, and heavy cream and simmer. In a small bowl, whisk cornstarch and water, add to skillet once the cream has bubbled. Thicken, about 5 minutes. Once the sauce is thick add your pasta and chicken to pan. Stir to combine and heat through. Enjoy! 

As seen on: I Heart Nap Time 

Christmas Treats

I know this post is a little late but I've been super busy and am just posting it now, besides you can make these any day of the week it doesn't have to be holiday only. They are super delicious. My Grandma called me to tell me they were the best marsmallows she's ever had in her life! I hope you enjoy them.
 Homemade Christmas Oreos, or as I like to call them Fauxreos
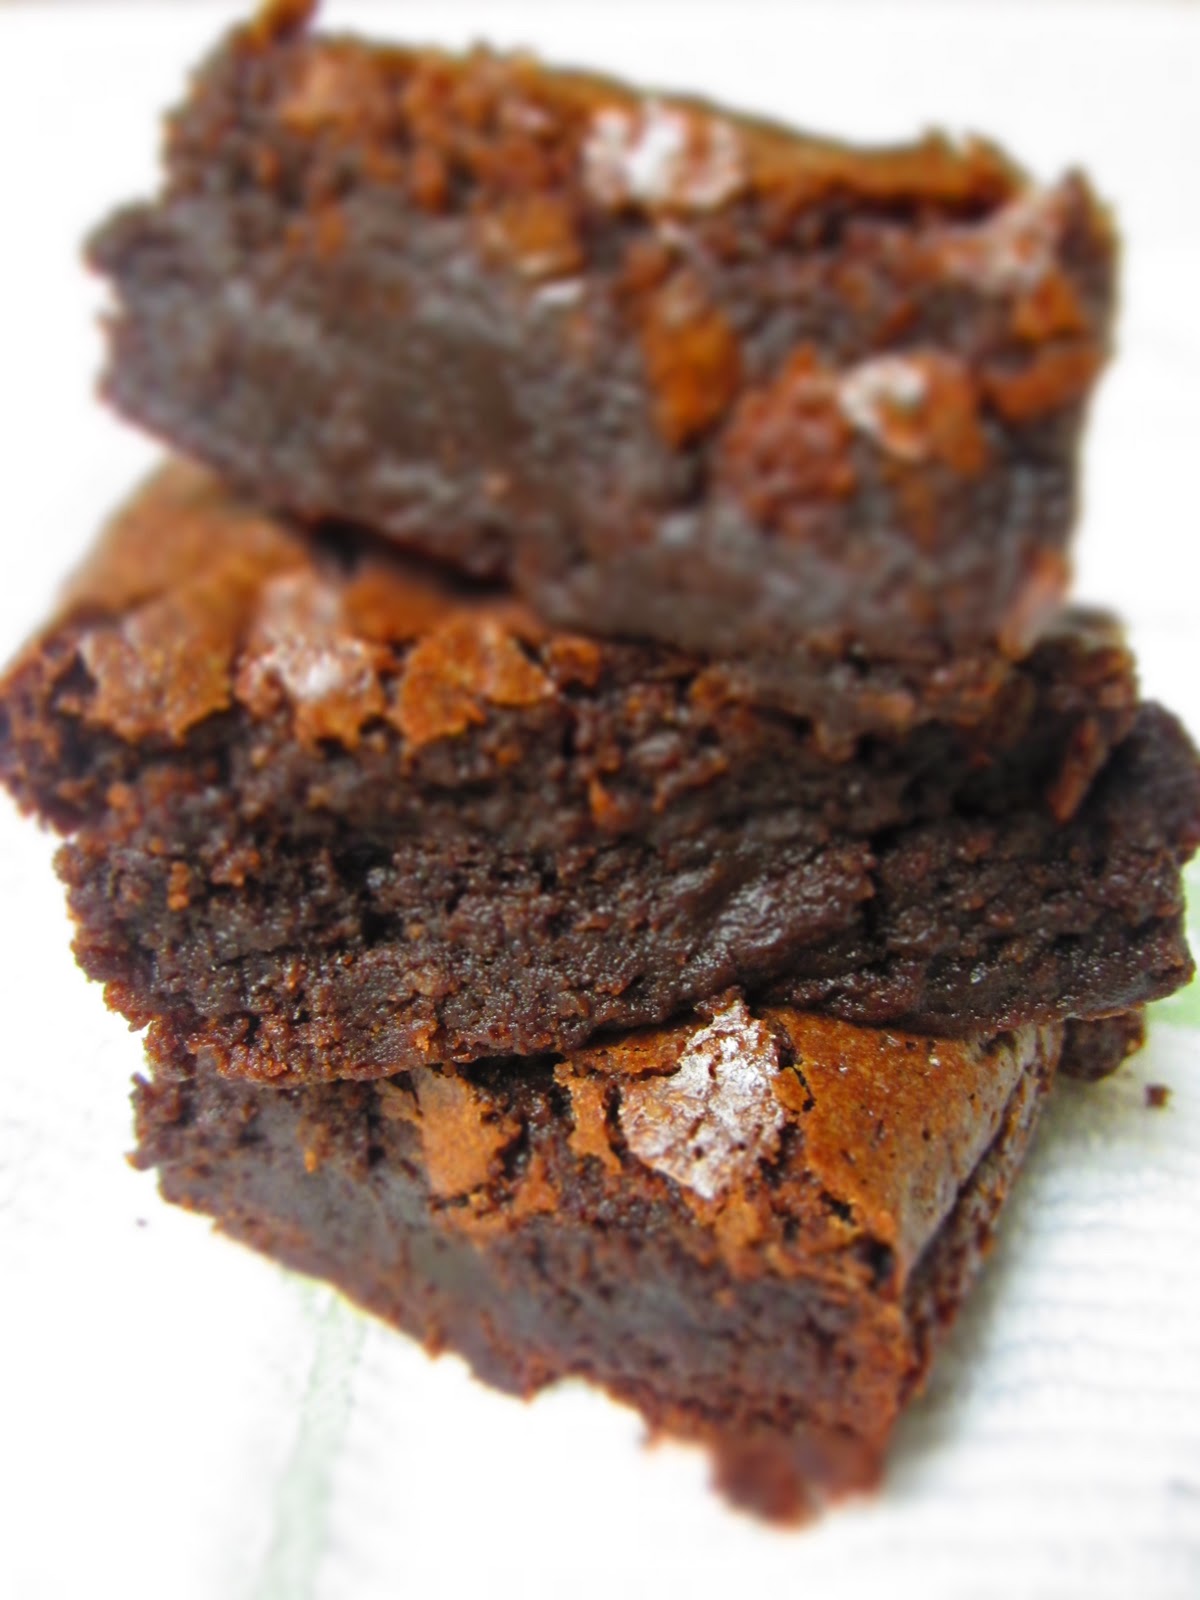
 Homemade Oreos
makes 25-30 sandwich cookies
Ingredients
For the chocolate wafers:
1 1/4 cups all-purpose flour
1/2 cup unsweetened Dutch process cocoa (I used Hershey’s Special Dark Cocoa)
1 teaspoon baking soda
1/4 teaspoon baking powder
1/4 teaspoon salt
1 to 1 1/2 cups sugar [see recipe note]
1/2 cup plus 2 tablespoons (1 1/4 sticks) room-temperature, unsalted butter
1 large egg
For the filling:
1/4 cup (1/2 stick) room-temperature, unsalted butter
1/4 cup vegetable shortening
2 cups sifted confectioners’ sugar
2 teaspoons vanilla extract (I used clear vanilla extract)
Optional- Gel dye
Method
1. Set two racks in the middle of the oven. Preheat to 375°F.
2. In a food processor, or bowl of an electric mixer, thoroughly mix the flour, cocoa, baking soda and powder, salt, and sugar. While pulsing, or on low speed, add the butter, and then the egg. Continue processing or mixing until dough comes together in a mass.
3. Take rounded teaspoons of batter and place on a parchment paper-lined baking sheet approximately two inches apart. With moistened hands, slightly flatten the dough. Bake for 9 minutes, rotating once for even baking. Set baking sheets on a rack to cool.
4. To make the cream, place butter and shortening in a mixing bowl, and at low speed, gradually beat in the sugar and vanilla. Turn the mixer on high and beat for 2 to 3 minutes until filling is light and fluffy. (Optional: Blend in a tiny bit of gel dye until you reach the desired color.)
6. To assemble the cookies, in a pastry bag with a 1/2 inch, round tip, pipe teaspoon-size blobs of cream into the center of one cookie. Place another cookie, equal in size to the first, on top of the cream. Lightly press, to work the filling evenly to the outsides of the cookie. Continue this process until all the cookies have been sandwiched with cream. Dunk generously in a large glass of milk.
 Vanilla Bean Marsmallows
You can make these marsmallows with any flavoring which is nice, you could cover them in chocolate too! They are good for hot cocoa, smore's, toasting in a fire or just by themselves!
Vanilla Bean Marsmallows 
About 1 cup confectioners’ sugar
3 1/2 envelopes (2 tablespoons plus 2 1/2 teaspoons) unflavored gelatin
1 cup cold water, divided
2 cups granulated sugar (cane sugar worked just fine)
1/2 cup light corn syrup
1/4 teaspoon salt
2 large egg whites or reconstituted powdered egg whites
1 tablespoon vanilla (alternately: 1/2 of a scraped vanilla bean, 2 teaspoons almond or mint extract or maybe even some food coloring for tinting)
Oil bottom and sides of a 13- by 9- by 2-inch rectangular metal baking pan and dust bottom and sides with some confectioners’ sugar.
In bowl of a standing electric mixer or in a large bowl sprinkle gelatin over 1/2 cup cold cold water, and let stand to soften.
In a 3-quart heavy saucepan cook granulated sugar, corn syrup, second 1/2 cup of cold water, and salt over low heat, stirring with a wooden spoon, until sugar is dissolved. Increase heat to moderate and boil mixture, without stirring, until a candy or digital thermometer registers 240°F, about 12 minutes. Remove pan from heat and pour sugar mixture over gelatin mixture, stirring until gelatin is dissolved.
With standing or a hand-held electric mixer beat mixture on high speed until white, thick, and nearly tripled in volume, about six minutes if using standing mixer or about 10 minutes if using hand-held mixer. (Some reviewers felt this took even longer with a hand mixer, but still eventually whipped up nicely.)
In separate medium bowl with cleaned beaters beat egg whites (or reconstituted powdered whites) until they just hold stiff peaks. Beat whites and vanilla (or your choice of flavoring) into sugar mixture until just combined. Pour mixture into baking pan and don’t fret if you don’t get it all out (learning from my mess of a first round). Sift 1/4 cup confectioners sugar evenly over top. Chill marshmallow, uncovered, until firm, at least three hours, and up to one day.
Run a thin knife around edges of pan and invert pan onto a large cutting board. Lifting up one corner of inverted pan, with fingers loosen marshmallow and ease onto cutting board. With a large knife trim edges of marshmallow and cut marshmallow into roughly one-inch cubes. (An oiled pizza cutter works well here too.) Sift remaining confectioners’ sugar back into your now-empty baking pan, and roll the marshmallows through it, on all six sides, before shaking off the excess and packing them away.

 Merry Christmas to my baby niece Zoe!!
My beautifully burlap wrapped Christmas present my Mother made for me, check out her blog at: Town and 
Country Living
As seen on: The Girl Creative
Make it Great Monday 

Sunday, January 1, 2012

Classic Mac n Cheese

Mac n Cheese, something I must be really picky about because I've tried so many recipes and have only found about 2 that I will ever make again. I really do enjoy some good mac n cheese. I'm so glad this recipe worked out because I was really close to giving up on making my own. This is pretty easy to make and just your standard mac and cheese but it's good! Very good. I wish I had some right now. I never really thought I liked adding breadcrumbs to my mac and cheese but I like it here. Adds a nice crunch, and it's not overpowering. Okay, on to the recipe! I hope you enjoy it just as much as I did. 
I made this in these cute little new pots my sister bought me for my wedding! Thanks sis. 

Classic Mac n Cheese
2 cups Toasted Bread Crumbs
salt
1 pound pasta shapes
6 Tbs unsalted butter
2 medium garlic cloves, minced
1 tsp dry mustard
1/4 tsp cayenne pepper
6 Tbs all-purpose flour
2 1/4 cups low-sodium chicken or vegetable broth
3 1/2 cups milk (low-fat is fine)
1 pound colby jack cheese, shredded (about 4 cups)
8 oz extra-sharp cheddar, shredded (about 2 cups)
ground black pepper
I halved this recipe due to the fact it's just my husband and I eating. We still had leftovers!  Preheat the oven to 400 degrees. Cook pasta in a heavily salted pot of water until al dente. Drain pasta and set aside. Melt butter in another pot and add in garlic, mustard, and cayenne. Cook until fragrant. Stir in flour and heat until golden. Whisk in broth and milk slowly and bring to a boil. Whisking often cook until large bubbles form and it's slightly thickened. This should take about 10-15 minutes. Remove from heat and stir in cheeses and melt. Season with salt and pepper to taste. Add pasta to cheese sauce until combined. Pour into a greased baking dish and sprinkle with crumb topping. Bake uncovered, until sauce bubbles and crumbs are crisp.

Bake uncovered, until the sauce is bubbling and the crumbs are crisp, 25-35 minutes.


Wedding, revisited

This is an addition to my previous Wedding post. I knew when I started the wedding planning I wanted something different. I'm not into the crazy, big, fantastic weddings. A friend of mine recommended this barn and it all started from there! I started googling barn weddings, eco-chic weddings, DIY weddings, green weddings, and rustic weddings. That's when I found my theme..well it wasn't really a specific theme I should say more of an idea to run with. I was really happy with the theme of my wedding. You might look at my wedding and say it's country, and I believe it is a little but not to the extreme. I did grow up in a small town after all. I don't wear cowboy boots on a day to day basis or really ever at all, but hey I wanted something fun and after all I did get married in a big red barn so I thought it was only perfect. I also saw several pictures of bridesmaids in cowboy boots and I fell in love. If you look at the boots they aren't even authentic cowboy boots, I just thought boots and dresses was too cute! I chose sunflowers because again, I saw so many pictures of barn weddings with sunflowers and I was really interested in them. One of my really great friends did the flowers for us. Another one of my really good friends I graduated Pastry school with made my cake. Isn't it beautiful? It was absolutely perfect! I still have the cake topper sitting on my tv cabinet, that sits on top of the cake board-a slab of tree! Which again I got the idea for online. I'm telling you I think I got most all my ideas from the internet. I know, creative right? :) It was my inspiration! I remember the day I came up with the colors for the cake, green and brown, "ewe" is what most people would say..you'll see it worked perfectly! I was working on cakes one day and saw this awesome green color paired with chocolate frosting and I said, "Those are my wedding colors!" This was before I was even engaged..I knew I would be soon it's all my husband and I had talked about at the time. I'd have to say I wouldn't have the wedding I did without my Mom. The engagement process wasn't always the prettiest, I lost my best friend after 10 years, and my Mom and I hit some rough patches. I think we were both expecting something different from each other and there was a lot of miscommunication. Weddings are stressful, but very happy times. Needless, to say my Mom and I worked out our differences and I love her to death. I could've never had the wedding I did with out her, one of the things I wish I could change..things that happened with my wonderful, amazing Mother. She made burlap banners, table cloths, helped with cleaning up the day after, setting up the day before, she helped pay for many things, she made invitations..you name it she helped with it. I am forever thankful for all her creativity help. I also wish I would have danced with her more at my wedding, I think I just got so caught up in the moment. Anyways, I love you Mom you're amazing! If you would like to see more of her awesome work head over to Town and Country Living. She's a great cook, an amazing Mother, a marathoner, a DIY-er, an all around helper, she's wonder woman :)
This is one of my favorite pictures
My sister getting ready, puttin them boots on!

Here are the programs my Mom worked so hard on and made sure they were perfect! She also got chalkboards, glued burlap on them and we placed them in a rustic burlap lined wheelbarrow..I wish more of the wheelbarrow was in the picture.
I get a lot of positive comments on my veil, I didn't want the traditional long veil, so not my style. I had seen these around and knew I wanted to wear one with a flower. Flower was bought at Target for about $7 and the veil was made by another friend!
 Sorry Mom, I had to put this up. I absolutely love it. This picture says it all :)

 Whose that young fellow, you might ask? That would be my little brother! He's goofy like me and he did such an amazing job, kept it short, sweet, and comical. I can't thank him enough for what he did. I wanted my wedding to be as personal as I could make it!
Here's the girls in their boots!
So proud of my bro!

This is me..crying as I'm reading my vows. We wrote our own, they were pretty much the same! I wish I would have saved those cards!!!
You may now kiss ...my sister! Yeah, that happened :)


 Our first dance, I love my new hubbys face here. We danced to Brad Paisley's Then, so perfect
 My Dad surprised me with a video of when I was a little girl, I cried the whole time. It was one of my favorite memories from the wedding


My Mom bustin' a move..how could I have gotten so caught up that I didn't dance with her? It's beyond me, she's got some moves and check out those legs! :) My Mom's probably laughing right now! I guess I'll just have to dance with her at my sister's wedding in June!

This was our guest book, it's a poster I found on Etsy. I struggled for awhile trying to figure out what I wanted and I decided with this.
 I found this online too, so I had my Mom make something to hang on the back of our chairs. Isn't she so crafty?
That's the hubby, with my Mom. I believe this was the dollar dance..which I had never heard of until about 4 months before my wedding and I thought what a fun idea let's do it. My DJ then told me he likes to make it a competition..even better idea, we made over $200!!! See below!

Here she is again dancing with her hubby :)
If you look up you can see the lit barn with the lanterns..so pretty I wish we would've gotten a better picture!
To check out the rest of the wedding photography click here to redirect to earlier wedding post Wedding pt 1
As seen on: Its a Blog Party
Lamb Around
Creative Mondays
The Girl Creative
Make it Great Monday 

Chicken Tortilla Soup

This will be my second post for chicken tortilla soup, similar recipe, better pictures :) I still think I prefer my older post to this soup better although they are very similar in taste. Love chicken tortilla soup and it's versatile to adding more ingredients. I saw this on someone's blog and it looked very yummy so I had to try it! You can add beans or corn if you'd like, I like mine with out. You can even make this vegetarian and omit the chicken and substitute vegetable broth for chicken broth. Did I mention it's super easy to make?  Hope you enjoy!

When making chicken tortilla soup I like to add my own homemade tortilla strips that I fry up, adds that extra crunch to the soup! Toppings are great for this soup and really make it great, but the broth still has great flavor. I also like to add cheese to the top, you can use whatever you like in this soup as far as cheese goes! This recipe also calls for adding tortilla pieces to the soup, you won't even notice them later in the soup, it just thickens the soup up a bit which is nice.


Toppings, I forgot my avocado :( 
Chicken Tortilla Soup
3 tablespoons extra virgin olive oil
6 corn tortillas, diced
1 tablespoon minced garlic
4 tablespoons chopped cilantro
1 tablespoon cumin
2 tablespoons chili powder
2 chicken breasts
8 cups chicken stock or broth
2 (15-ounce) cans diced fire roasted tomatoes
1 large onion, chopped
Salt and pepper to taste
Toppings:  chopped avocado, fried tortilla strips, cheese, sour cream, chopped cilantro, lime juice wedges 

Heat oil over medium-high heat in a large pot until hot.  Add the diced tortillas and garlic and cook until soft.  Add the cilantro, cumin, and chili powder and stir to evenly coat.  Add broth. 
Process the tomatoes and onion in a blender until smooth.  Stir into soup.  Bring to boil, then let simmer for about 30 minutes.  Season with salt and pepper.
To serve, ladle soup into bowl, then add whatever toppings  you desire.

Sunday, December 18, 2011

Amazing Brownies

So I've totally been on this brownie kick lately. I mean seriously, been craving them everyday for the past two weeks. No, I'm not pregnant, I just really love chocolate and really want brownies! I usually make the same brownies every time and I am in love with them. Now that I know how to use my camera a little better I'll have to make them again and take pictures! I decided to venture out and make a different kind this time. I have probably about 20 different brownie recipes I'd like to try. I know, I'm insane when it comes to treats, but after all I did go to school to be a pastry chef! Love my sweets, even if they make me fat. :) Anyways, these brownies are super easy to make and you don't need a lot of ingredients. They're pretty amazing too of course. I found this recipe off one of my favorite blogs mybakingaddiction So many yummy treats on here to try!! You can always add walnuts or chocolate chips or any other mix ins if you want. I like brownies the way the are with out nuts, but it's your preference. If you love brownies make these now!!! I hope you enjoy them as much as I did!

Amazing Brownies
2/3 cup all-purpose flour
1/2 teaspoon salt
1/2 teaspoon baking powder
veg cooking spray
2 ounces unsweetened chocolate
4 ounces bittersweet or semisweet chocolate
10 tablespoons (1 stick plus 2 tablespoons) unsalted butter
1 1/4 cups sugar
2 teaspoons vanilla extract
3 large eggs

Preheat oven to 325. Line a 8x5 pan with parchment having a little overhang so that you can pull them out after baking. Spray with nonstick cooking or baking spray. Whisk dry ingredients and set aside. Melt chocolates and butter in double boiler. Stir chocolate so that it doesn't burn! Once melted, add sugar and stir, add in eggs, slowly, so not too cook them. Add in eggs separately mixing after each one. Add in vanilla. Add the dry to the wet and combine. Pour into baking dish and bake 35-45 minutes. Cool brownies for 15 minutes, and then pull out of the pan. Cool completely before enjoying, if you can! :)

Source: Amazing Brownies at My Baking Addiction


 Watch out they're addicting..and not diet friendly..or are they? ;)

Cinnabon Cinnamon Rolls

Okay so I've never actually had cinnabon's cinnamon rolls but they seem to be popping up everywhere and they do always look amazing. There's something about waking up on the weekend and enjoying some hot fresh cinnamon rolls. This is the second recipe I have tried and I enjoy both. I have many more to try! :) Since I'm usually just making them for my husband and I, I freeze the rest for the next couple weekends! I will say they are a little time consuming but well worth it! I hope you enjoy these!

Cinnabon Cinnamon Rolls

Yield: 12 large buns
Ingredients:
Dough
1 (1/4 ounce) package dry yeast
1 cup warm whole milk
1/2 cup granulated sugar
1/3 cup margarine (or 80% margarine 20% butter spread)
1 teaspoon salt
2 large eggs
3 1/4 cups all-purpose flour
3/4 cup bread flour
Filling
1 cup light brown sugar
3 tablespoons ground cinnamon
1/3 cup margarine (or 80% margarine 20% butter spread)
Method:
  • For the rolls, dissolve the yeast in the warm milk in a large bowl.
  • Add sugar, margarine salt, eggs, and flour, mix well.
  • Knead the dough into a large ball, using your hands dusted lightly with flour.
  • Put in a bowl, cover and let rise in a warm place about 1 hour or until the dough has doubled in size.
  • Roll the dough out on a lightly floured surface, until it is approx 21 inches long by 16 inches wide.
  • It should be approx 1/4 thick.
  • To make filling, combine the brown sugar and cinnamon in a bowl.
  • Spread the softened margarine over the surface of the dough, then sprinkle the brown sugar and cinnamon evenly over the surface, leaving about 1″ untouched around edges.
  • Gently roll into a fairly tight roll, trying to keep the filling inside.
  • With a sharp knife, slice into 12 pieces.
  • Place on parchment lined cookie sheet about 2″ apart, cover with lint-free cloth, and let rise for another hour.
  • Bake in 400 degree on rack just above center, for about 10 minutes, or until light golden brown.
  • Cool on cooling rack and gently place into airtight container when cool.
Icing:
4oz cream cheese
1/2 C margarine (1 stick)
1 3/4 C powdered sugar
1 tsp vanilla
1/8 tsp lemon flavor (preferably alcohol free)

Okay so this is where it gets somewhat time consuming..like I said before so worth it!
Remove the cream cheese and margarine from the refrigerator and place it into the mixing bowl. Leave it for about half an hour so that it will not be too cold.
Use the Flat Beater (or Paddle) to blend the cream cheese and margarine for 6 minutes. Use a speed of 65 RPM, or the “slow mixing” speed on your machine. I use setting #2 on my KitchenAid Mixer.
Switch to the Stainless Steel Whip and whip the cream cheese and margarine mixture for 10 minutes. Use a speed of 150 RPM, or the “medium fast whipping” speed on your machine. I use setting #6 on my KitchenAid Mixer.
Add 1 cup of the powdered sugar and mix for 1 minute using the Stainless Steel Whip at 65 RPM. Add the remaining 3/4 cup of powdered sugar and mix for an additional minute. Lastly add the flavorings and whip until combined. After pulling cinnamon rolls have cooled a bit but are still warm, ice away! Enjoy.


 These are definitely big cinnamon rolls. Big Amazing Butter Gooey cinnamon rolls that is!!!
 I enjoy lots of icing on mine :) Icing love!


Don't you just want to take a bite right now? 
Related Posts Plugin for WordPress, Blogger...